
The eNudge Drag and Drop Editor for your email content creation gives you great flexibility by separating the concepts of Settings (which apply to the entire email design), Rows (which can be added, removed, copied, saved, and moved), Columns (where you have a row split into multiple sections, aligned side-by-side) and Blocks (individual content blocks: images, text, buttons, etc., which also can be added, removed, copied, and moved).
Email Settings
Access settings via the Email tab in the right-hand panel:
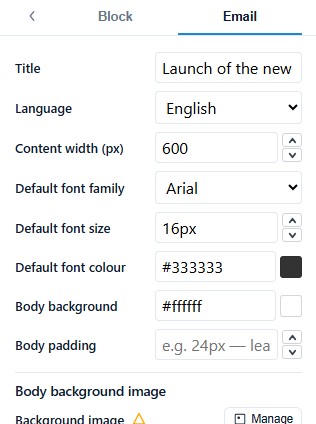
General settings for the design are inherited by Structure and Content blocks. For example, the Default font family is then used everywhere in your design, except where you choose a different font. Email Settings are very useful to build a coherent email design with a minimum of fuss.
In Settings, you will set the:
- Title & Language – these are important for accessibility, but don’t appear in your email.
Width of the email.
Content alignment (left or centred).
Default Font family, size and colour.
Body background colour i.e. the colour behind your email content.
- Outer background colour i.e. the colour outside the content area of the email.
- Body padding – the space around your whole email, which likely you will want to be 0 (the default).
Rows
From the rows selector in the left, you can click or drag and drop to add new rows into your email design.
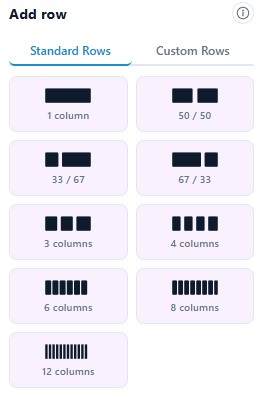
Rows are structural units that define the horizontal composition of a section of your email design, potentially separated into columns (up to 12 columns is available by default, but you can add and subtract columns as required).
Using more than one column allows you to put different content elements side by side.
By default, you will see a collection of pre-set row templates, starting with a full-width single column.
You can save a row of content, for easy re-use in other email campaigns. Once you have saved a row for re-use, you can access it via the ‘Custom Rows’ tab.
Each row has it’s own structure, as well as background colour, content background colour, borders, alignment, treatment on mobile etc. Therefore, using a row for each main element within your email design gives you the greatest amount of flexibility.
Blocks
The blocks in the left hand panel provides tiles that represent the different kinds of content you can use in your email campaign.
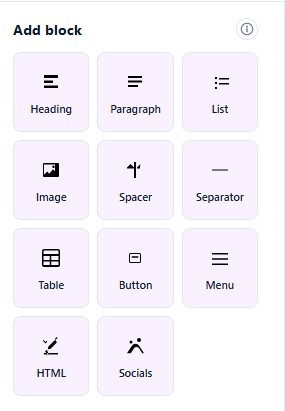
To use a content type, drag an icon into in your email layout or click to add it to the bottom. Your new block will auto-adjust to the column width.
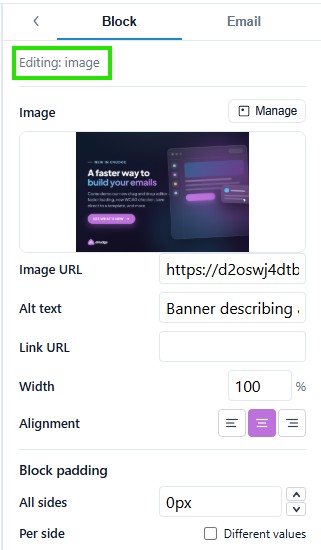
Every content block has its own settings, such as granular control on padding. Click within the content block, and the right-side panel will automatically switch to a property panel for the selected content element. You will see the impact of your changes in the Editor Preview. The screen below shows an example of the property panel when editing an image.
Inserting a Template
You can also create a new email using one of the supplied mobile responsive templates. To insert a template:
Click on the ‘Choose Template’ button in the top navigation.
Click on the ‘Use Template’ button to insert the template into the editor. Your templates are shown first, followed by the standard templates supplied by eNudge.
Edit as desired!
Saving and Testing
Once you have your email content looking fine, and ready to test, click on the Save button in the top navigation.
Then click the ‘Return to Campaign’ button in the top right hand corner, so that you can send yourself a test.