
The Add to Calendar block allows you to provide a button in your email campaigns where the recipient can click on the link to go to an eNudge hosted “Add to Calendar” page with links to add an event or reminder to their calendar, including:
- Google calendar
- Outlook.com calendar
- Office 365 calendar
- Yahoo calendar
- Desktop Apple or Outlook i.e. download an .ics file
The recipient simply clicks on the link to insert your event into their calendar.
This can be really helpful to ensure people remember to attend your event, or remember to pay an invoice!
NB: Only available for eNudge Pro and eNudge Enterprise accounts.
To use the Add to Calendar feature:
- While editing your eNudge Email or eNudge Message Series Email campaign content, drag and drop the Add to Calendar block into the Editor Preview.
2. It will appear in your content as follows:

3. Click on the Add to Calendar button to see all the controls for this block type in the right hand panel:
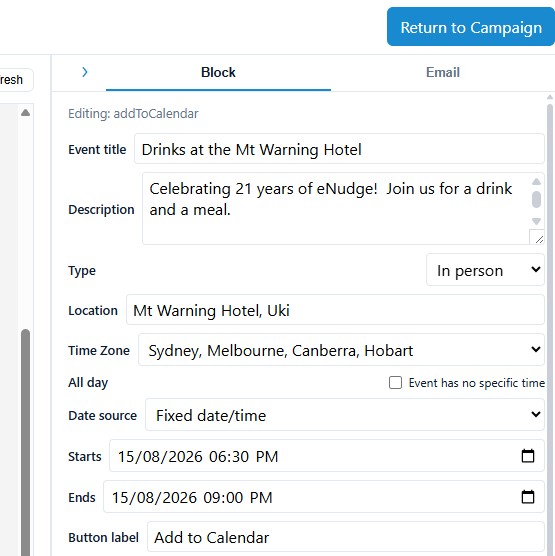
- Event Title: The name of the event will appear at the top of the Add to Calendar page, and also in the recipient’s calendar.
- Description: The description you add will appear in the top of the Add to Calendar page, and also in the recipient’s calendar details.
- Type: Choose from ‘in person’ and ‘online’.
- Location: Add the address for your event, or paste in the URL for your online event.
- Time zone: Choose the time zone of your event. If your recipient is in a different time zone, the event date & time will adjust automatically.
- All day: Tick this box if the event relates to the whole day rather than a specific time in the day e.g. a birthday or anniversary.
- Date source (eNudge Enterprise accounts only) choose from:
- ‘Fixed date/time’ where every recipient gets the same date & time to add to their calendar e.g. for an event.
- ‘Personalisation field’ – where every recipient gets a custom date & time to add to their calendar e.g. for a payment reminder.
- If you choose this data source, you then need to choose one of the 15 eNudge custom fields into which you will place the individual’s event details.
- The content of the selected field must contain the per-recipient value including a date, time, and duration in minutes: YYYY-MM-DDTHH:mm|duration (e.g. a 1-hour event at 2PM on the 15th September would be entered as 20262026-09-15T14:00|60).
- Button Label: text that appears in the button in your email campaign.
Tip: if you need more room to see the contents of the Add to Calendar inspector, click on the ‘less than’ symbol in the top left of the panel.
Below is an example of the expanded inspector:
4. Set the button styling and styling for around the button using the rest of the controls on the page, as per a regular button block.
5. Save your campaign, and send yourself a test.
When the user clicks on the ‘Add to Calendar’ link in their email, they will be taken to a screen that looks like the following (but with your event details in it of course!)
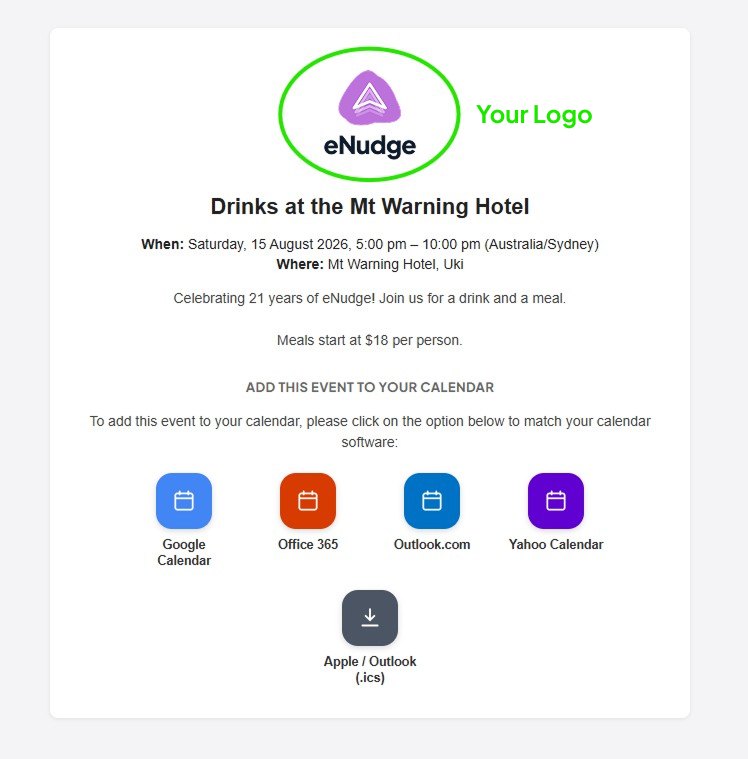
Your contact can then click on the appropriate calendar link and following the instructions on screen to add the event or reminder into their calendar.